Chapter 2: Installing and Launching
This chapter takes you from a laptop with nothing installed to a working Claude Code session that responds to its first prompt. Plan on ten to twenty minutes the first time, most of it spent on the one-time sign-in. Once the install is done, opening Claude Code in the future will take about two seconds.
One piece of vocabulary before we start. An installer script is a small program, published by the software’s maker, that downloads the right version for your machine and puts it where your terminal can find it. Installing Claude Code means running one such script — a single line pasted into the terminal. It is the same idea as the pharmacy receiving a pre-packaged unit dose instead of compounding from raw ingredients: someone upstream did the assembly; you just put it on the shelf.
Installing Claude Code
Pick the section that matches your operating system.
On macOS or Linux. Open the terminal (see Chapter 0) and paste this line:
$ curl -fsSL https://claude.ai/install.sh | bash
Read that line once, because the pattern recurs throughout this book. curl is a terminal program that downloads whatever lives at a web address — here, Anthropic’s official installer script. The vertical bar | is a pipe: it hands whatever comes out of the left-hand command to the right-hand command. And bash runs what it receives. The whole line therefore means: download Anthropic’s installer and run it. The script detects your machine type, installs Claude Code, and finishes in under a minute.
If you already use Homebrew — the popular installer-of-installers for Mac — this works just as well:
$ brew install --cask claude-code
On Windows. Claude Code runs natively on Windows. Open PowerShell (press the Windows key, type “PowerShell”, press Enter) and paste:
> irm https://claude.ai/install.ps1 | iex
Same pattern, PowerShell dialect: irm downloads the installer script, the pipe hands it over, iex runs it. One recommendation while you are at it: install Git for Windows (from git-scm.com) if it is not already on the machine. Claude Code leans on git — the version-control tool you meet properly in Chapter 8 — for its safety nets, and having it in place from day one avoids a puzzling error later.
If your institution manages software through WinGet, Microsoft’s own package manager (a package manager is a tool that installs and updates software from a central catalog), this is the equivalent:
> winget install Anthropic.ClaudeCode
⚠️ Warning. The download-and-run pattern is safe here because the address is Anthropic’s own, printed in Anthropic’s official documentation. It is not safe as a habit. Never paste a
curl ... | bashorirm ... | iexline from a forum post, a chat message, or a search result without knowing exactly whose script you are about to run — it executes with your full user permissions, sight unseen. Treat an unverified install line the way you would treat an unlabeled syringe.
🧠 Remember. One line, once. You do not need Node.js, Python, or any other programming environment installed first. The installer brings everything Claude Code needs, and keeps itself up to date afterwards.
🔧 Technical Stuff. Older guides tell you to install Claude Code with
npm install -g @anthropic-ai/claude-code. That still works — npm is the package installer of the JavaScript world, and it requires Node.js (the program that runs JavaScript outside a browser) version 18 or later. But it is now the legacy path. The native installer above is what Anthropic recommends: no Node.js detour, and updates arrive automatically.
An optional aside: WSL2. Plenty of advice still circulating online tells Windows users that Claude Code requires WSL2 — Windows Subsystem for Linux, a Microsoft feature that runs a small Linux environment side-by-side with Windows. That advice is out of date: the native Windows install above works fine, and nothing in this book requires WSL2. It remains a reasonable choice if you also want a full Linux environment for other data-science tooling, since much of the Python and R ecosystem assumes Linux. If you already have WSL2, install Claude Code inside it with the same curl line as macOS and Linux.
Checking the install
When the installer finishes, close the terminal, open a fresh one, and type:
$ claude --version
If you see a version number, the install worked. If you see command not found, close and reopen the terminal once more — a terminal only reads its list of available commands when it starts, so a freshly installed command sometimes needs a fresh window to be seen. If it still fails, rerun the install line and read its final message; the installer prints exactly where it put the program.
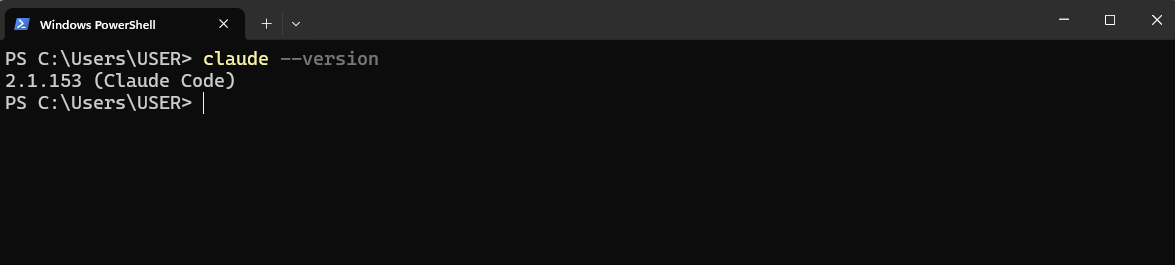
claude --version and which claude (or where claude on Windows) confirming Claude Code is installed and on the system pathAuthenticating: telling Claude who you are
The first time you run claude, it walks you through a one-time login. Two options exist.
Option 1: Claude account login. If you have a paid Claude Pro or Claude Max subscription on your KHCC SSO email, choose this. Claude Code prints a URL on the screen. You copy it into a browser, sign in with your Claude account, click “Approve,” and the terminal automatically catches up. Your usage now runs against your subscription, not a separate meter.
Option 2: API key. An API key is a long string of random characters that authenticates you to Anthropic’s servers directly. Think of it as a hospital ID badge that proves which user is making the request. You generate it on the Anthropic console, paste it into Claude Code, and from then on every request is billed to whoever owns that key, by the token. This path is for headless servers and overnight pipelines, not for daily interactive work. We come back to it in Chapter 17.
🧠 Remember. For your daily work at KHCC, use the Pro or Max subscription. Save API keys for the day you set up a scheduled pipeline that runs without you sitting at the laptop.
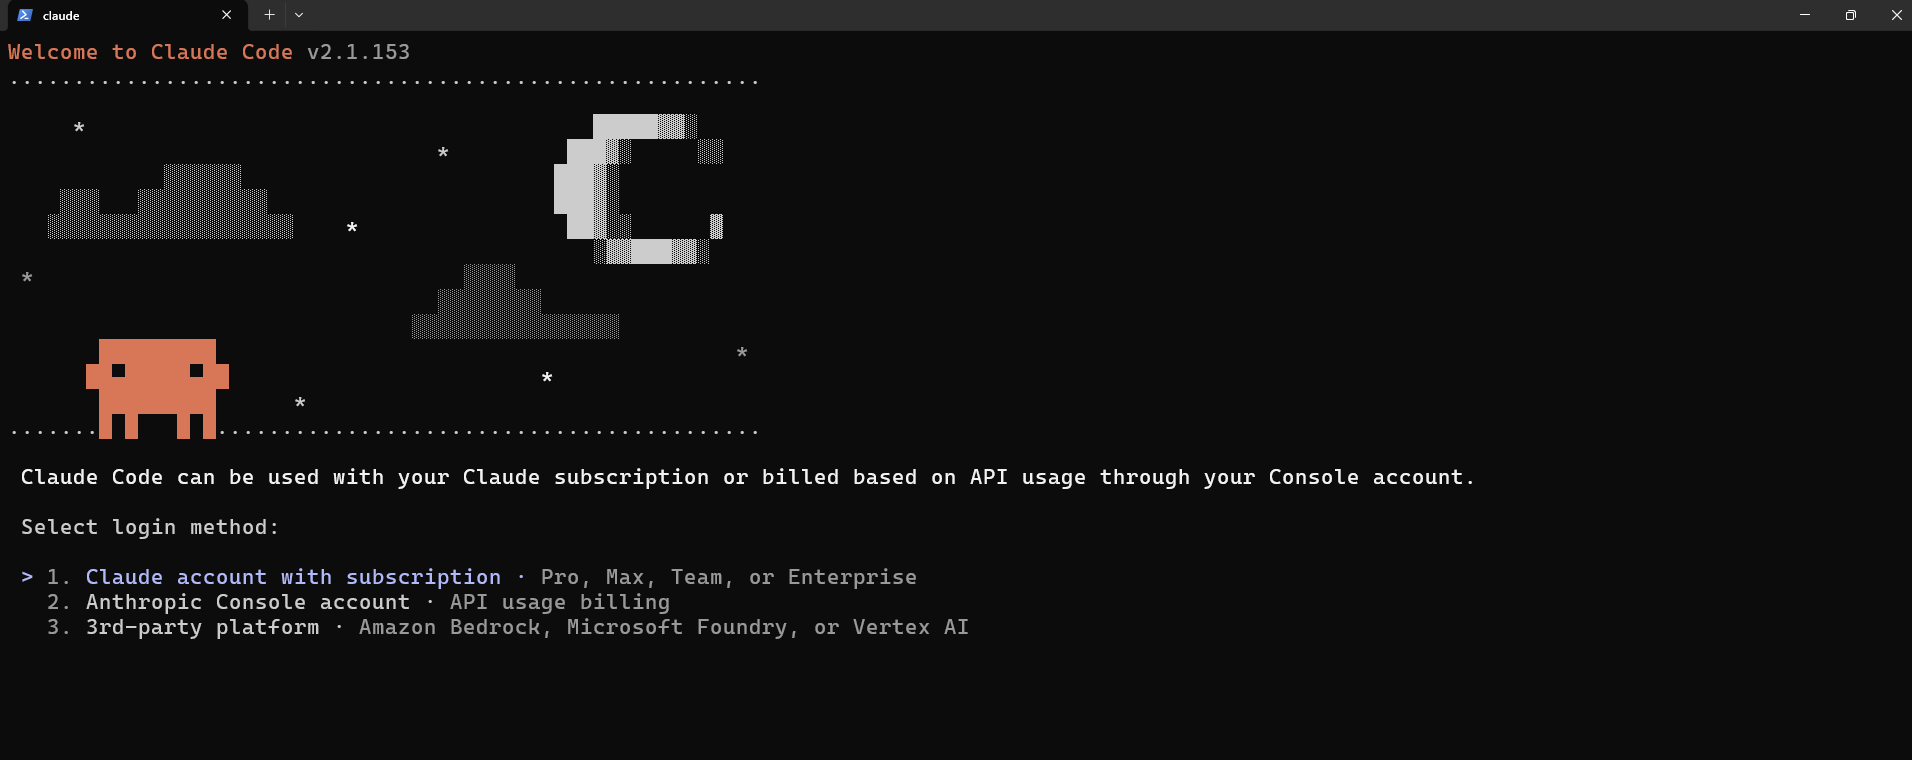
claude launch showing the welcome message and the authentication prompt with a sign-in link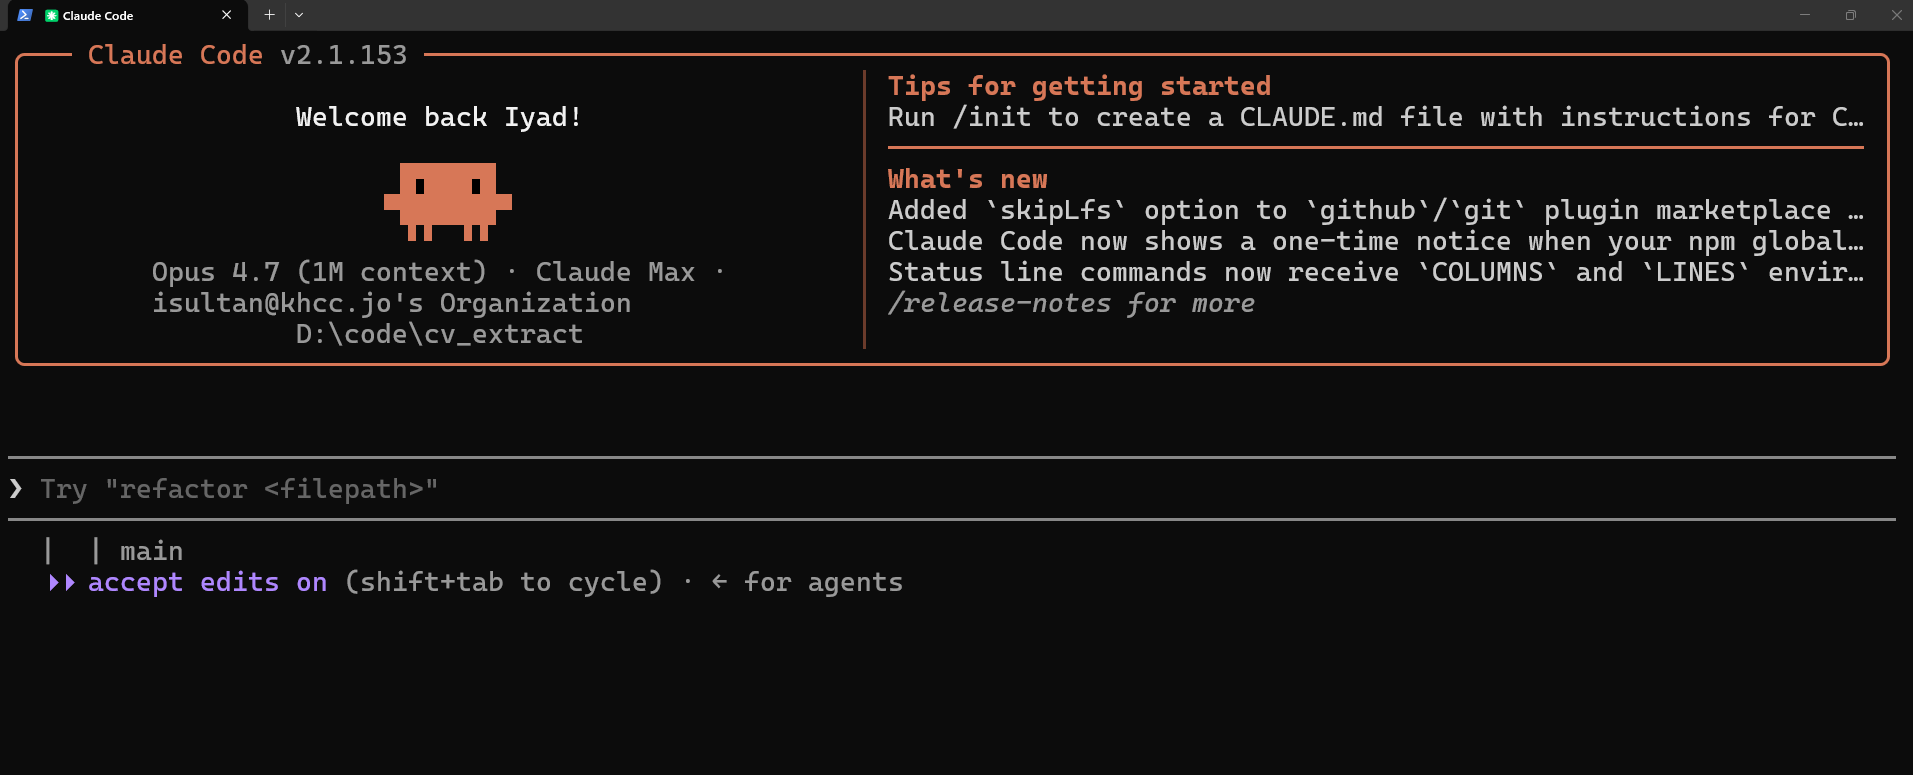
Your first session, narrated
Let’s walk through the first time you open Claude Code, with the actual characters you will see on the screen.
You open the terminal. You navigate to a project folder, even if the folder is empty. We will use a fresh folder called cci_test on the desktop.
$ cd ~/Desktop
$ mkdir cci_test
$ cd cci_test
$ ls
The last line shows that the folder is empty. Now start Claude Code:
$ claude
After about a second, a welcome panel appears. It tells you which version of Claude Code you’re running, which model is selected (usually Sonnet), and which folder Claude is “in” (the folder you ran the command from). At the bottom of the panel, a cursor blinks next to a prompt symbol that looks something like this:
>
That is Claude Code’s prompt. It is waiting. Type a sentence in English and press Enter:
> what files are in this folder?
Claude responds with something like:
This folder is empty. It contains no files or subdirectories.
That is your first round trip. You asked a question, the agent used its Glob tool to look, and reported back. There is nothing more elaborate happening on the first turn.
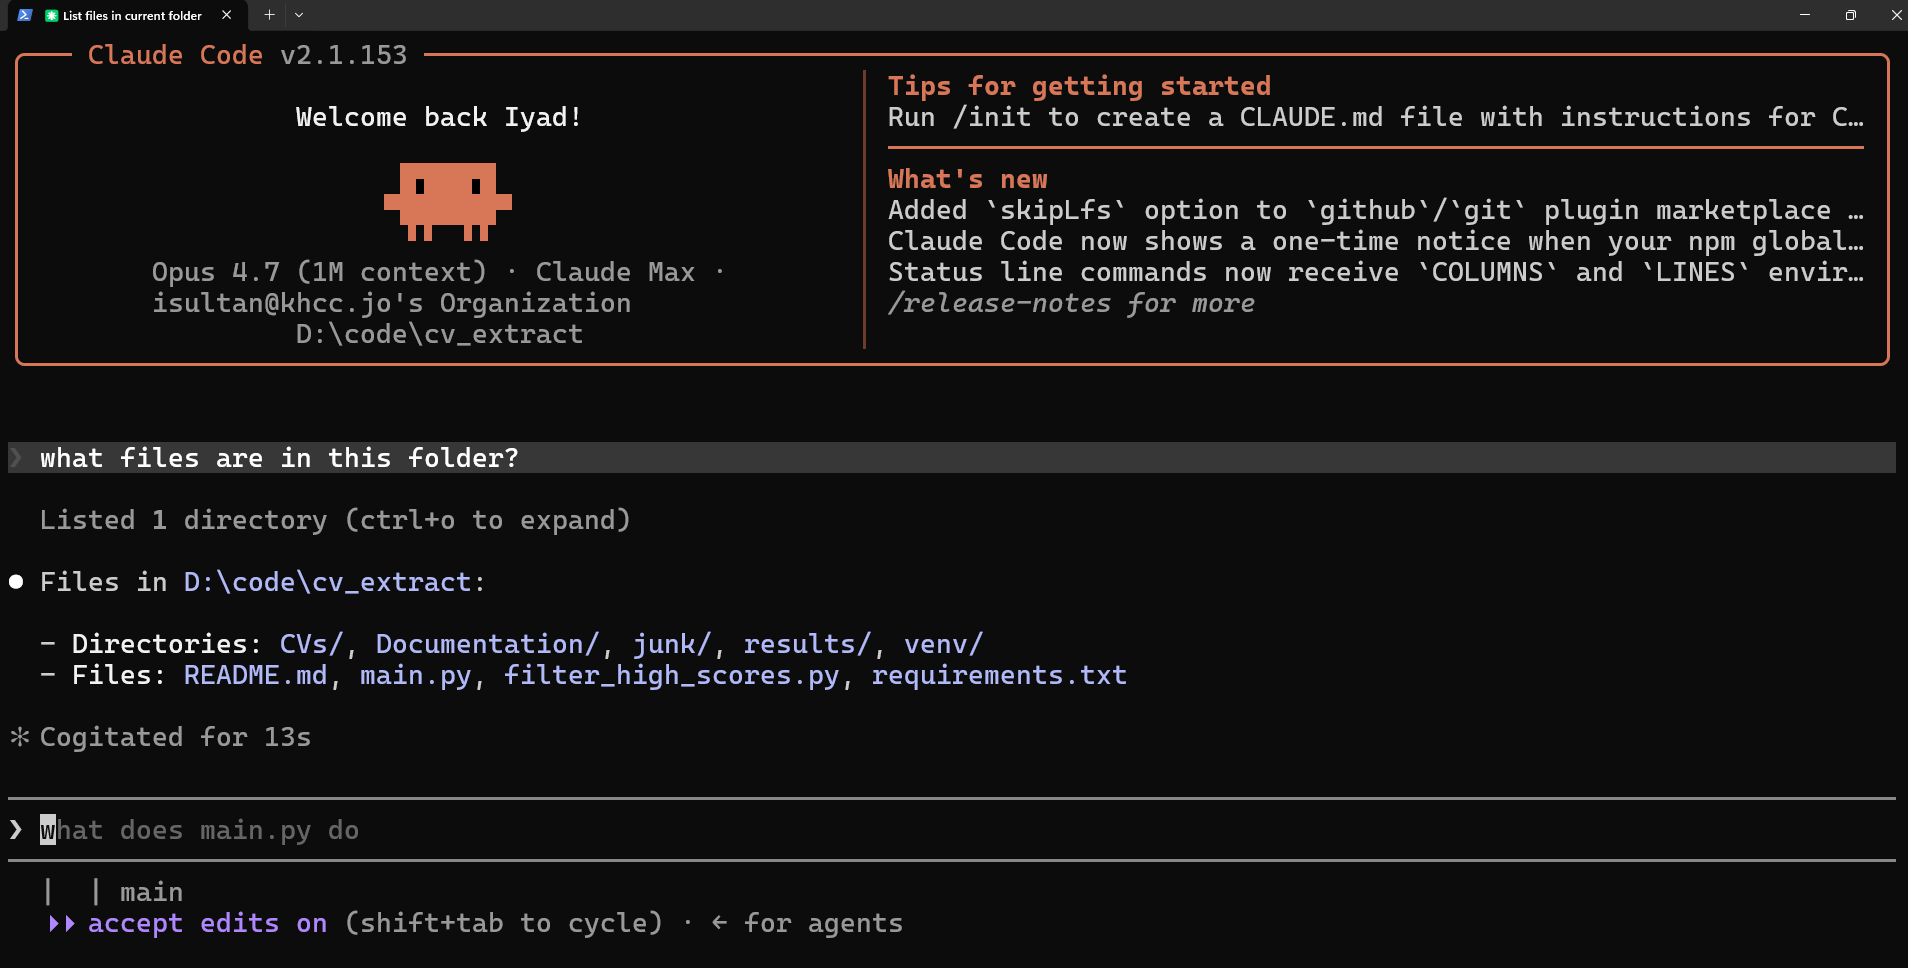
Now try a second:
> create a small text file called notes.md with a single line that says "hello from KHCC".
Because this is a write action, Claude will pause and ask for permission — something like “Claude wants to use Write on notes.md. Allow?”. You say yes. The file is created. Run ls again from inside the session (just type ls) or exit and run it from the terminal — either way, the file is there.
Press Ctrl+C once. Claude says it is stopping its current task. Press Ctrl+C a second time. The session ends and the terminal prompt returns. You have just used Claude Code end to end.
The three keystrokes that matter most
Memorize these three. You can use Claude Code professionally with just these.
claude— open a new session in the folder you are currently in.Ctrl+Ctwice — exit. The first press cancels the current task. The second press closes the session. (One press will not close it by itself, which is deliberate, so you don’t lose a session by accidentally tapping the key.)/clear— wipe Claude’s memory of the current conversation, without leaving the session. Use this when you finish one task and want to start a fresh unrelated task in the same folder. Otherwise the agent keeps everything from earlier in the session in its head and gets confused.
💡 Tip. When in doubt,
/clear. A clean session almost always beats a long messy one. Start each new task with a clean head — yours and Claude’s.
Slash commands: the built-in menu
Anything you type that starts with / is a slash command — a built-in instruction to Claude Code itself, not to the model. Type /help to see the whole list. The handful that matter in the next few chapters:
/clear— wipe the conversation./help— list every slash command./cost— show how much this session has cost so far./model— switch which Claude model is doing the work (Haiku is small and fast, Sonnet is the balanced default, Opus is the largest). Model names and version numbers change every few months;/modelalways shows the current menu, so trust the menu over anything printed in a book — including this one./permissions— open the permissions panel (Chapter 4).
Don’t memorize all of them today. They show up one chapter at a time, in the order you need them.
Resuming a session
You closed your laptop. You went to a meeting. You came back the next morning. You don’t want to start over.
$ claude --resume
This shows you a list of every previous session, organized by folder and timestamp. Pick the one you want. Claude reloads the entire conversation history — same files in context, same plan, same opinions about your code — and you continue from where you stopped.
🧠 Remember. Sessions save automatically. You don’t have to remember to save. If you ever wonder “did I save that?” — yes, you did.
This is how real work actually gets done with Claude Code. Almost nobody finishes a real project in one sitting. You build for an hour, you stop, you go to clinic, you come back, you build for another hour. Treat sessions as resumable workspaces, not one-shot conversations.
A shortcut alias (skip this for now)
You will see people on the internet add a shortcut alias to their shell so they can type cc instead of claude, like this:
alias cc='claude --dangerously-skip-permissions'
That flag — --dangerously-skip-permissions — turns off all the permission prompts that protect you from accidents. The flag is named exactly what it is, and Chapter 4 explains in detail why even the person who built Claude Code does not use it. Skip this trick for now. When you come back to it after reading Chapter 4, the safer version is just:
alias cc='claude'
You save four keystrokes. You also keep your filesystem intact.
A note about installing on Databricks
A handful of readers will eventually install Claude Code on a Databricks driver node — the cloud compute that runs the AI Office pipelines (Chapter 0.5 introduces that fleet). The mechanics are the same one-line installer, but the expectations are different. On a personal laptop, the worst-case outcome of a mistake is you re-clone a repo. On a Databricks driver, the worst-case outcome is a permissioned write against aidi_catalog that you can’t undo. We come back to this in Chapter 17, with the right safety rails in place. For now, install on your personal laptop.
⚠️ Warning. Never install Claude Code on a shared production server or a Databricks driver until you have read Chapter 4 (permissions) and Chapter 17 (headless mode). The interactive defaults you’ll use on your laptop are wrong for production environments.
Try This
Install Claude Code on your laptop. Authenticate with your KHCC Claude account. Then cd into any project folder — or just create an empty one on your desktop — and type:
$ claude
When the cursor appears, type each of the following in turn, pressing Enter after each:
/help— read the list of available commands once, slowly.What's in this folder?/cost— see how little that exchange cost in tokens./clear— reset.Ctrl+C, thenCtrl+C— exit.
You have now used six different controls in Claude Code. That is more than 80% of the people who downloaded it ever learn.
Watch Out
Do not add alias cc='claude --dangerously-skip-permissions' to your shell on day one. It is the single most common reason a new user wrecks a working project in their first week. Build the habit of seeing the permission prompts and saying “yes” or “no” intentionally, before you build the habit of skipping them. The few seconds of typing you save are never worth the file or repo you lose.